Managing a Google Ads account can sometimes be an overwhelming task, especially if you’re juggling multiple marketing responsibilities for your business. One of the best ways to streamline your process is by adding other individuals to your account. This allows them to assist you with campaign management, ad creation, tracking, and more. In this blog post, we will go over the detailed steps on how to add someone to your Google Ads account.
What You Should Know Before Adding Someone
Before we delve into the steps, it’s important to understand the different access levels available on Google Ads:
1. Administrative access: This is the highest level of access and gives the user full control over the Google Ads account.
2. Standard access: Allows the user to perform most functions in the account like managing campaigns and generating reports but they can’t add or remove users.
3. Read-only access: Users can view and run reports, but can’t make any changes.
4. Email-only access: The most limited access. Users can receive report and notification emails, but can’t sign in to the account or make any changes.
The Steps to Add Someone to Your Google Ads Account
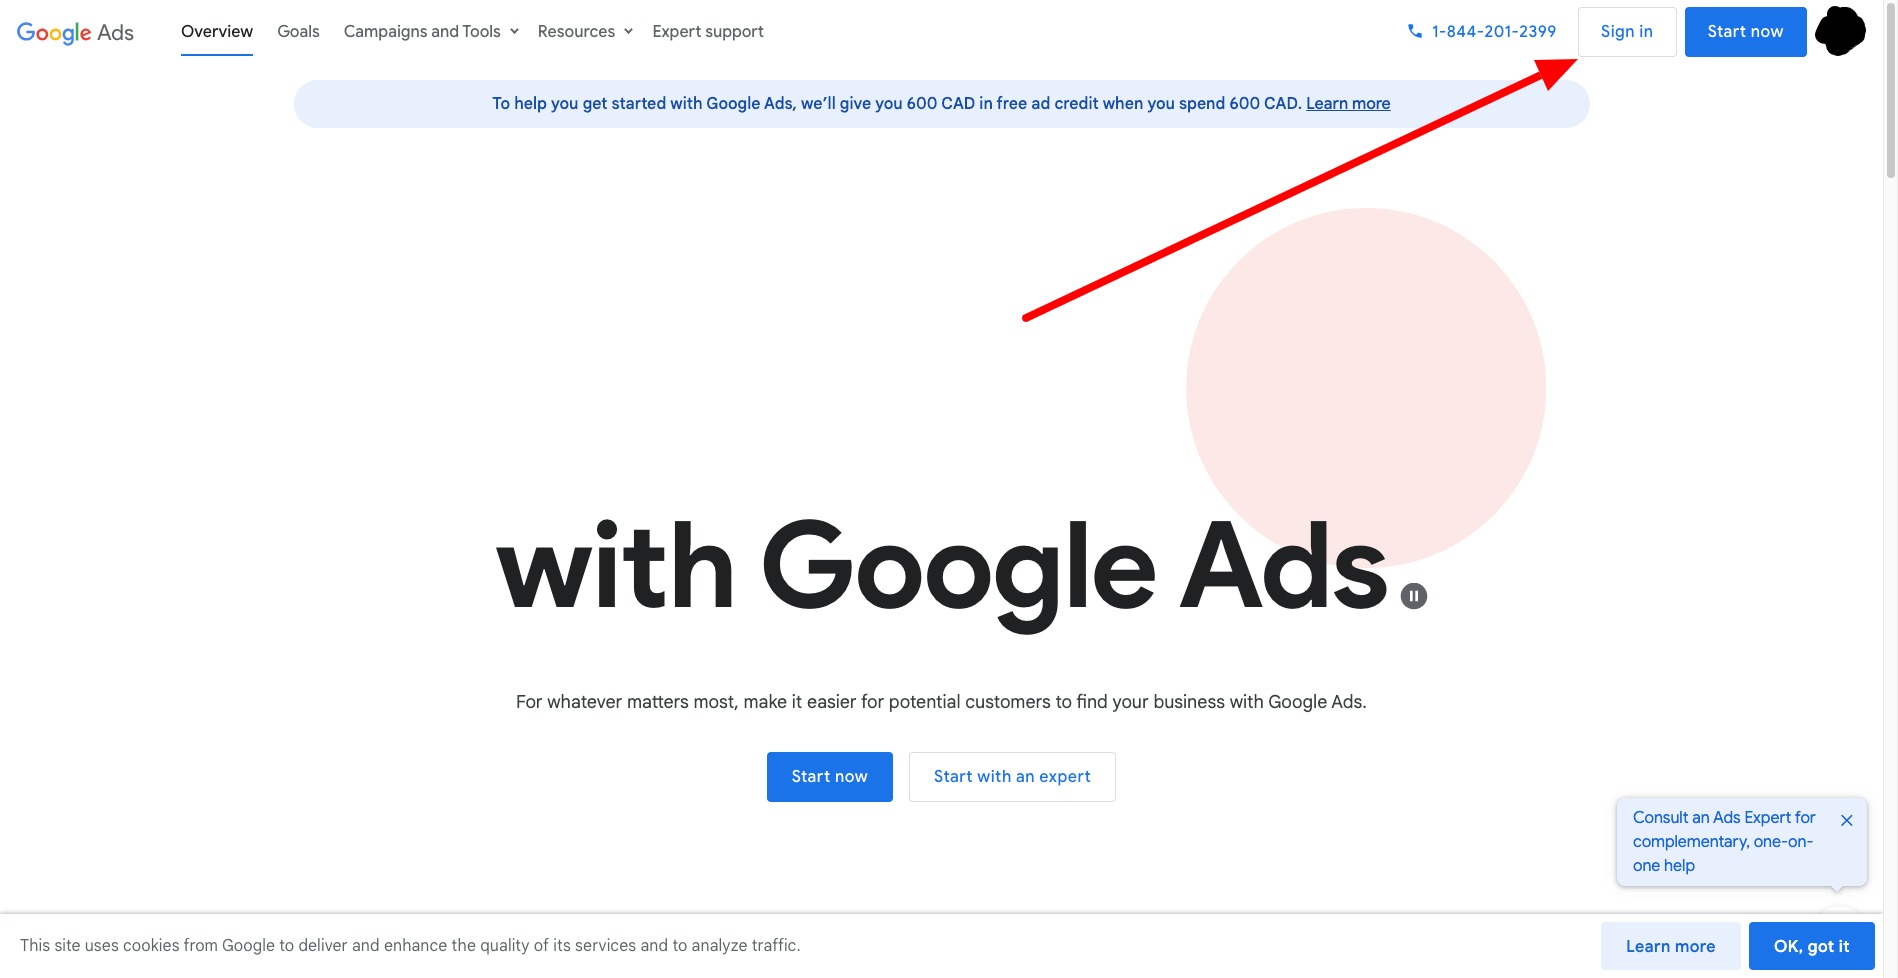
Step 1: Sign in to your Google Ads account
Start by signing into your Google Ads account using your login credentials. Once you’re logged in, you’ll land on the main dashboard.
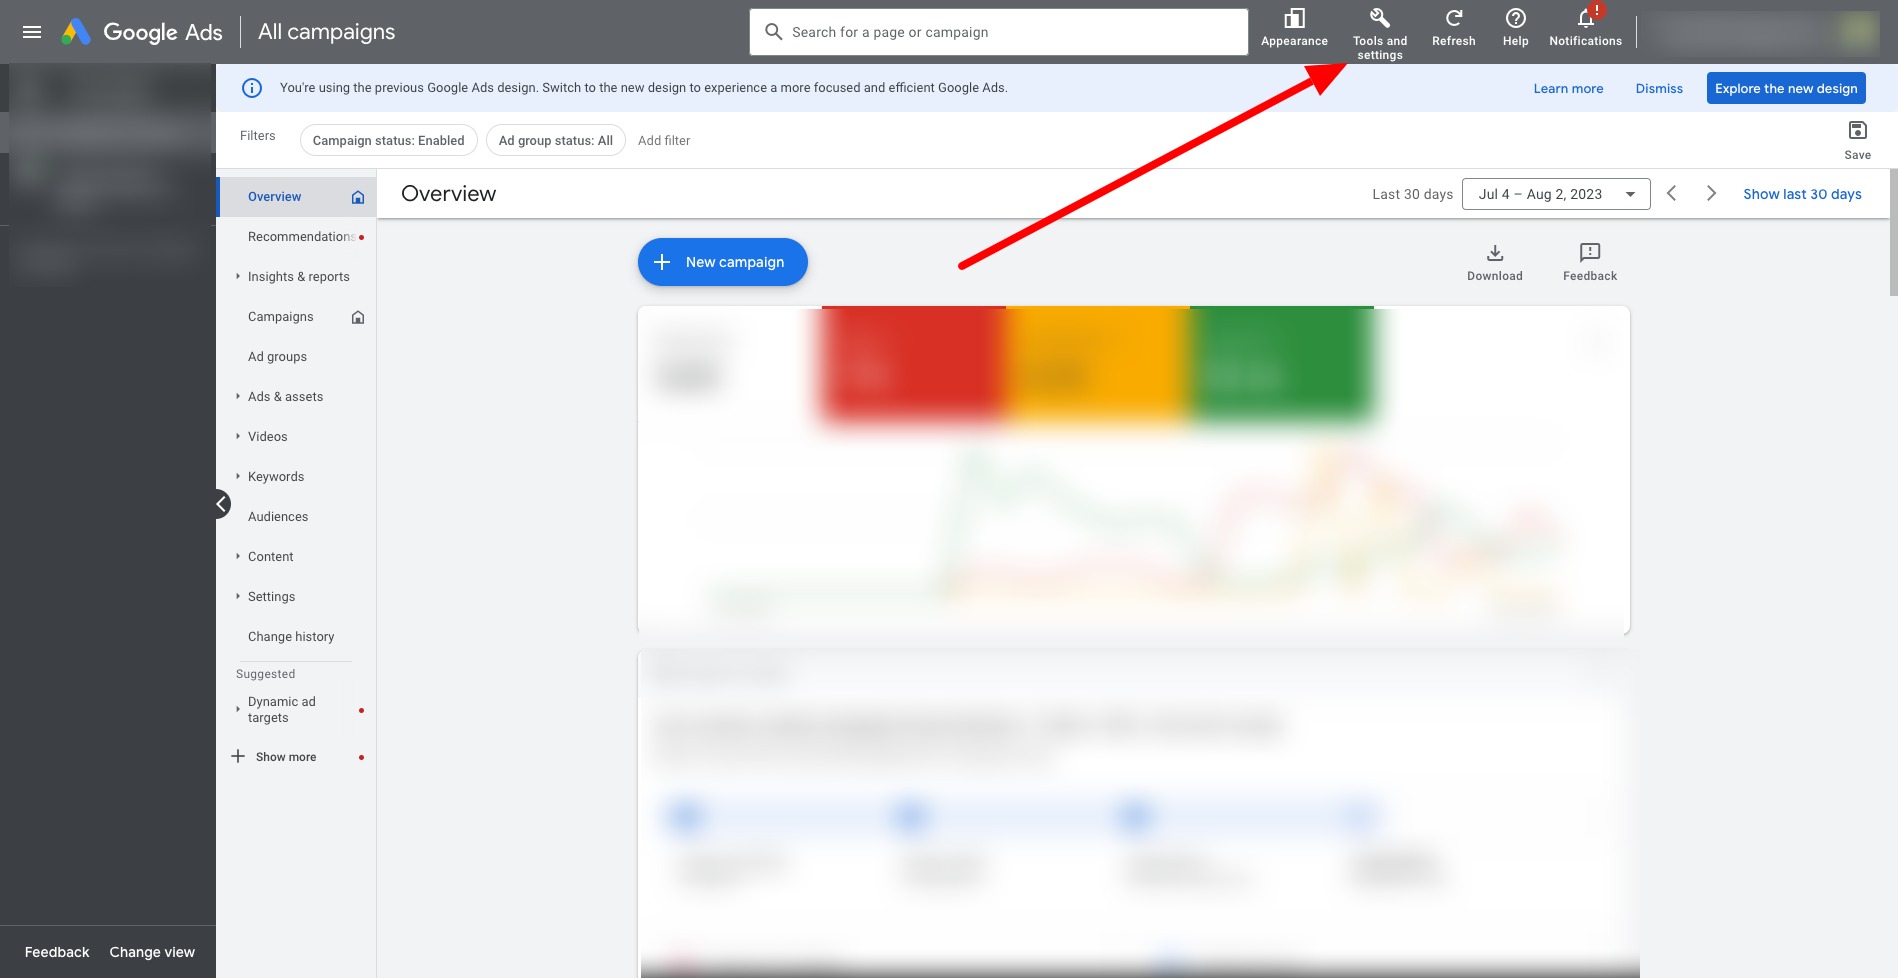
Step 2: Navigate to the Users Section
From your Google Ads dashboard, click on the ‘Tools & Settings’ icon, which looks like a wrench, located in the upper right corner. From the dropdown menu, select ‘Access and Security’ under the ‘Setup’ category.
Step 3: Add New User
On the ‘Access and Security’ page, you’ll see the list of people who have access to your account. To add a new user, click the blue plus (+) button or ‘Plus’ icon, depending on your interface.
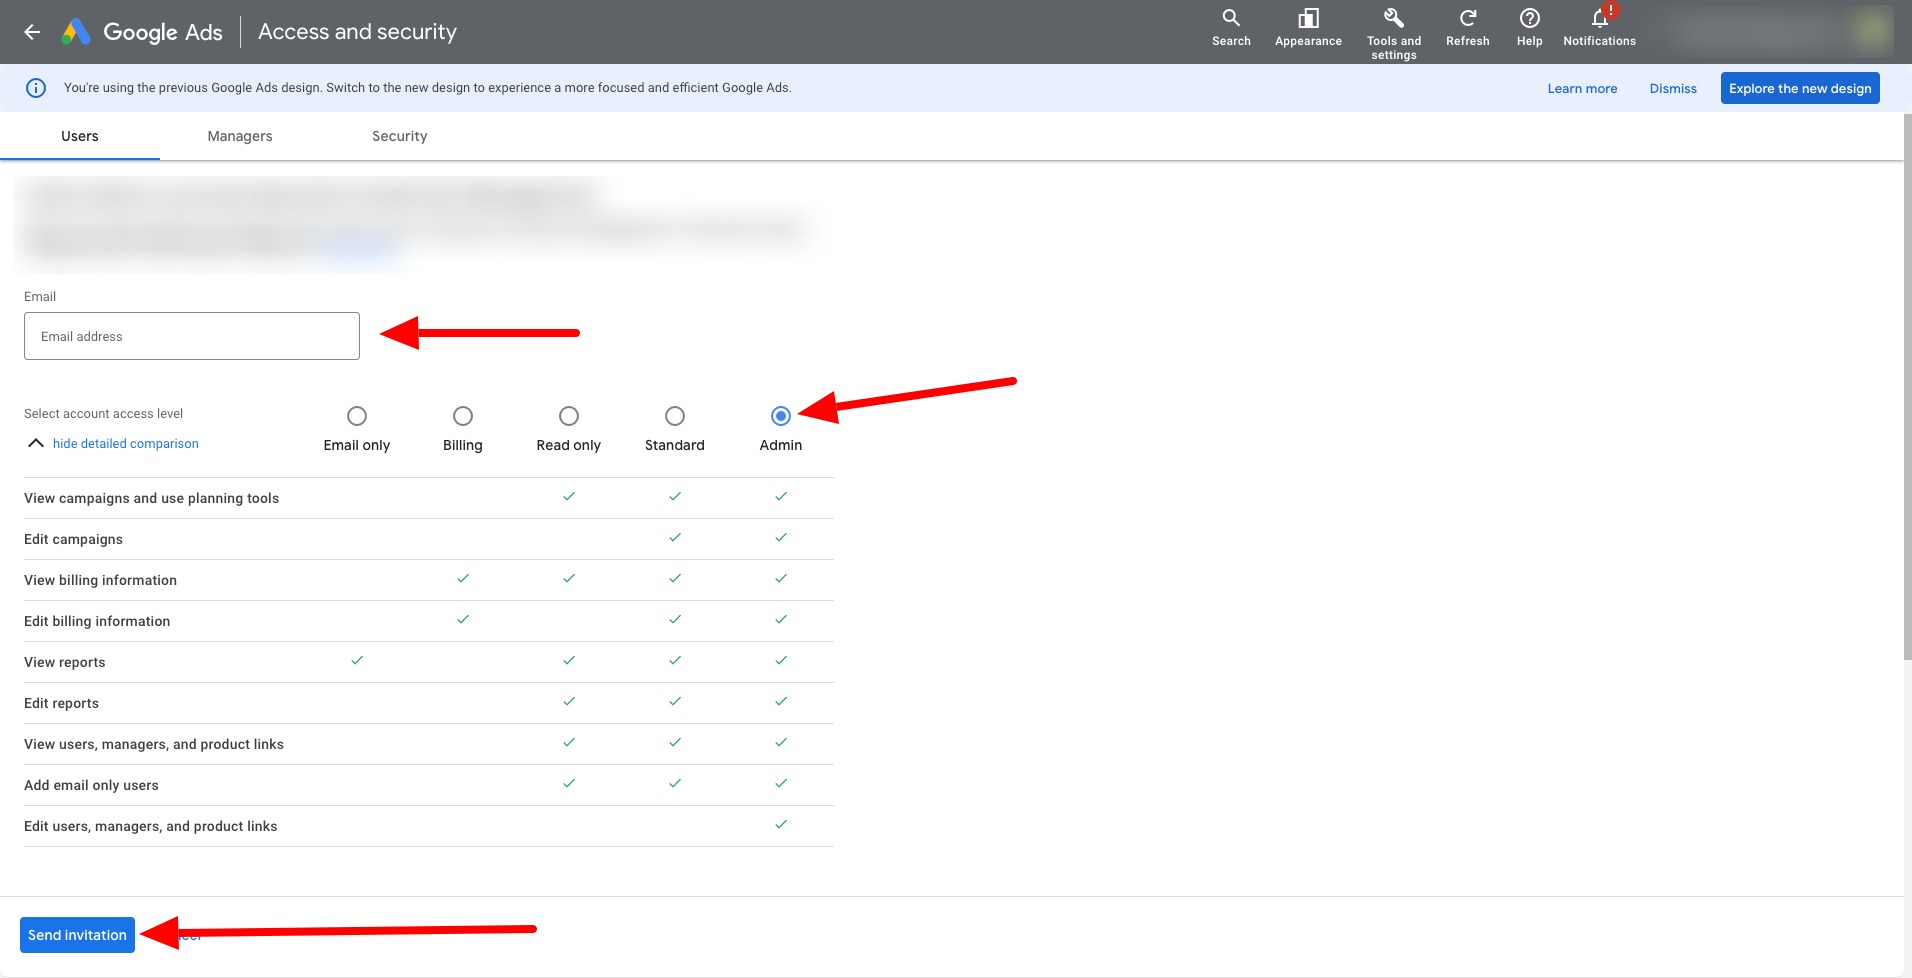
Step 4: Enter User Details
A window will appear, asking you to enter the email address of the person you want to add to the account. Enter the email address, then select the access level you want to grant them. Make sure to think carefully about the level of access you give, as it will determine the changes they can make in your account.
Step 5: Send Invitation
Once you’ve entered all the information, click the ‘Send Invitation’ button. Google will then send an email to the user, asking them to accept the invitation.
Step 6: Accepting the Invitation
The person you’ve invited will need to accept your invitation to gain access to your Google Ads account. They can do this by clicking on the link in the invitation email they received. Once they’ve accepted the invitation, you’ll receive a notification, and they will appear in your user list.
Conclusion
Being able to share the responsibilities of managing a Google Ads account can significantly lighten your workload and ensure that all tasks are handled promptly and effectively. By following the steps above, you can add anyone you trust to your account. Keep in mind that it’s crucial to assign an appropriate access level to ensure that your Google Ads account is kept secure and only the necessary changes are made.
Always remember, you can change a user’s access level or remove them completely at any time should the need arise. With the right team in place and good collaboration, you can truly make the most of your Google Ads endeavors.


